Friday, May 30, 2014

What's on the menu? {Meal planning 5/29-6/4}


I used to do my grocery shopping on whatever day we ran out of food and I would drag my husband along {literally drag, he hates grocery shopping}

Then I started planning our meals and we would go every Saturday. That worked for a while except that the stores are so busy on Saturday. I hated how crowded the aisles were! I tried Mondays but they were just as busy. I finally settled into a routine of going on Tuesday. The stores were quiet. The aisles mostly empty. And I could just stop at the store on my way home from work. It was perfect. Especially for my husband because I would go alone. I actually started enjoying grocery shopping because I enjoyed the time alone. I was free to wander the aisles or hurry through my list. Tuesday was my day. That is until I decided I wanted to start price matching!

The ads for the two grocery stores in the area arrive in the mail on Wednesday. That meant I was doing all of my shopping on Tuesday, getting the ads on Wednesday, and not being able to price match for a whole week when I went back to the store. It wouldn't matter if I could find everything at Walmart but since there are sometimes things on sale at the grocery stores that Walmart doesn't carry I want to be able to go to that grocery store and pick those things up before they are out of stock!
{like last week a grocery store had ground beef on sale $2.79/lb. That is like UNHEARD of these days. It was right before the holiday weekend though and they ran out QUICK so I wasn't able to get any because I didn't go right away.}

So I have changed my grocery plan!
I will get the ads on Wednesday, go through them, figure out what I want to price match, make my menu plan, & my shopping list. Then on Thursday after work I will do the grocery shopping!

This is the first week I'm trying out this new schedule but so far so good!

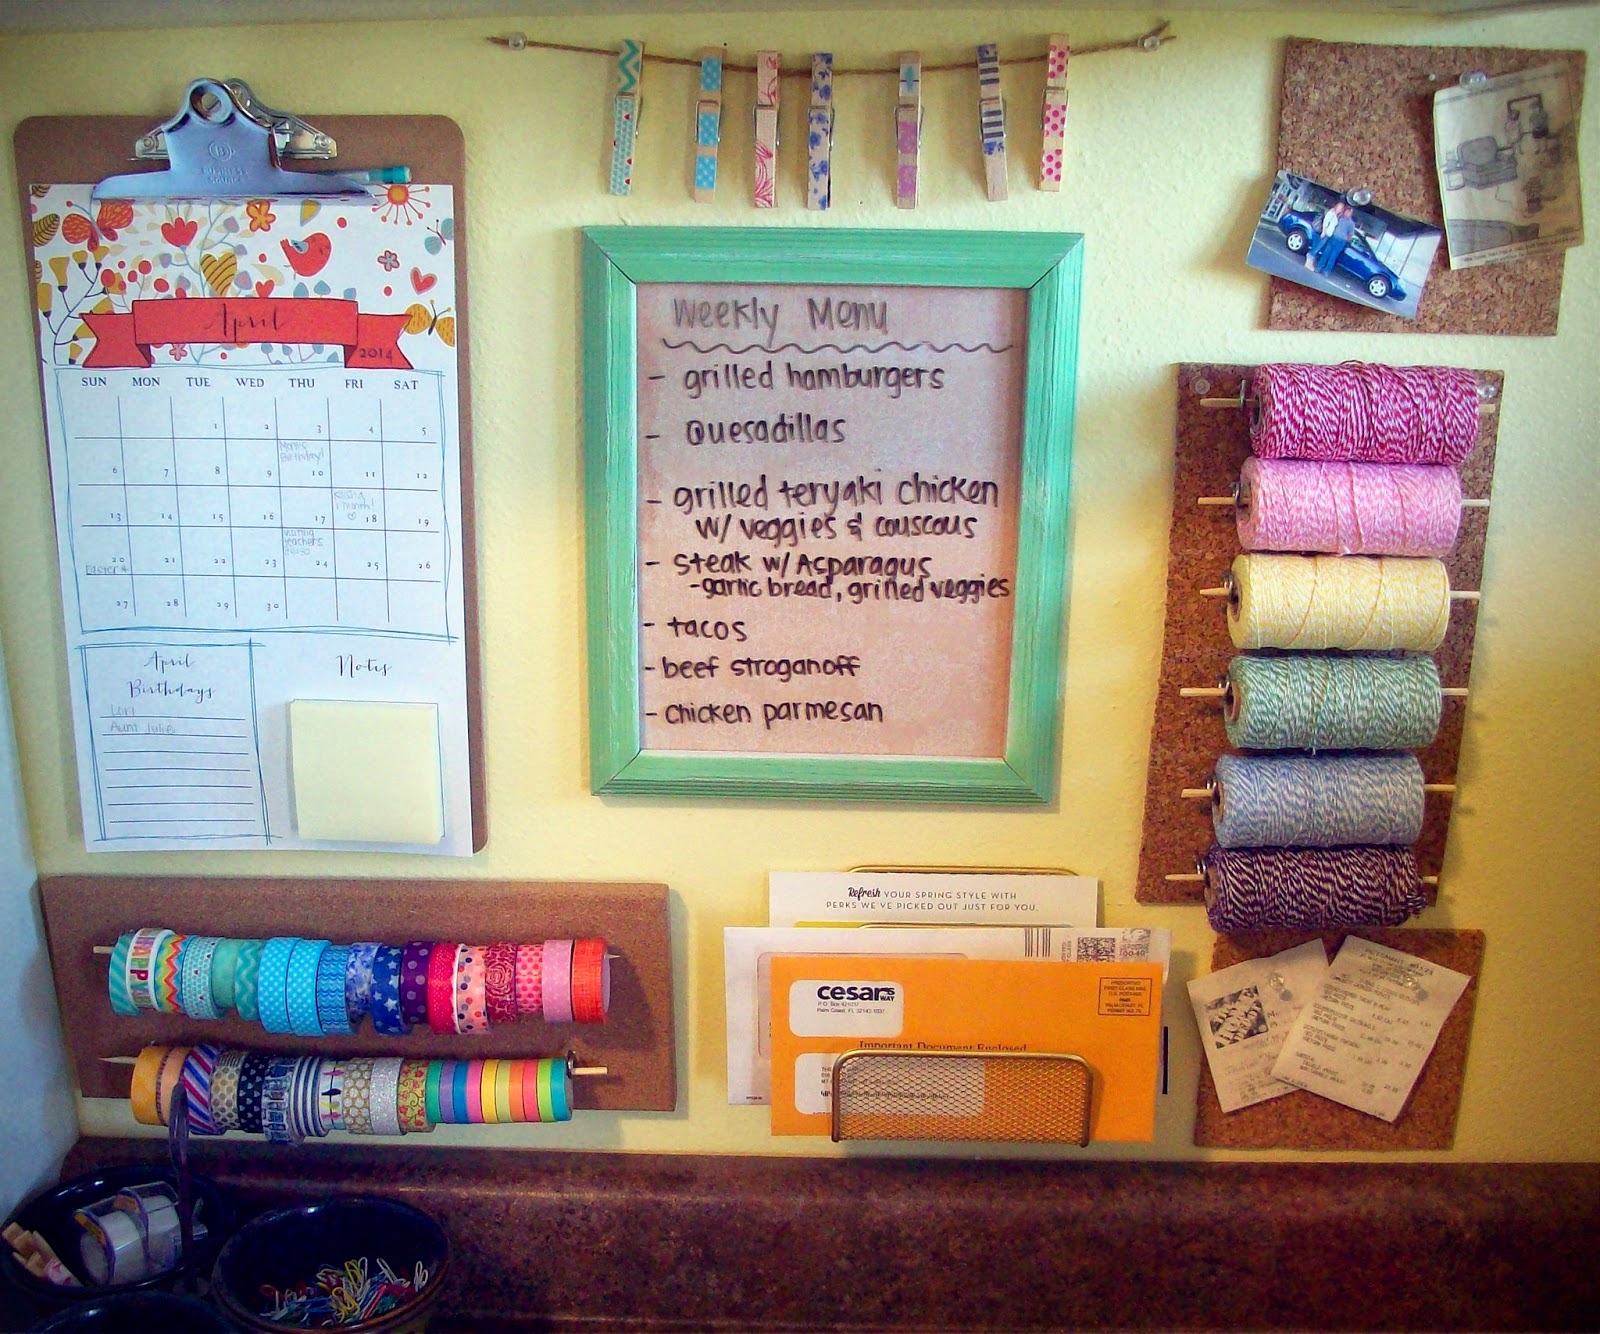
Take at look at my meal plan for the next week...


What are you having this week?

xoxo

Friday, May 16, 2014

DIY Gallery Wall {using thrift store frames}


A few weeks ago my friend and I were inspired to create our own gallery wall with a collage of frames. We hunted through a few thrift stores and yard sales looking for different sized and shaped frames and mirrors.

After finding our frames we stopped in at Walmart to pick out our spray paint. We settled on cream, light green, and gold.


After several coats over two days our frames were finished. I decided to put up my frames on this large blank wall right inside my front door over the kitchen table.


Though I like the look of the empty frames I wanted more variety so I added a wedding picture into the center frame as the focal point. Then I pulled out these navy blue letters my sister made for me several months earlier using a cricut machine. "Mr" and "&" are just lightly taped to the front of the frame. "Mrs" is actually between the glass. 


I absolutely love how it turned out. I love the contrast of the cream, gold, and pop of light green. I like that it adds to the wall but doesn't seem heavy or crowded.


This was such a fun, easy, and CHEAP project. I only spent a few dollars on frames and a few more on paint. I'm so glad my friend and I did this together. If you have a blank wall you want to decorate without spending more than $10.00 a gallery wall with thrift store frames is definitely the way to go.

xoxo

Monday, May 12, 2014

{What I made for dinner: Roasted Asparagus & Grilled Steak salad}


The other night my husband wanted to grill the t-bone steaks we had in the freezer. I don't like steaks with any bones or fat so I cut off the meat and gave the rest to my husband. I made him garlic bread, sauteed mushrooms and onions, as well as mashed potatoes to go with his steak but I wanted something a little lighter. I decided to make a big ol' salad and I'm so glad I did because it turned out delicious!

Take a look...


romaine lettuce
roma tomatoes
roasted asparagus
grilled marinated steak
sauteed mushrooms & onions
cheese & garlic croutons
mozzarella cheese
caesar dressing
& a squeeze of lemon

basically it was pure heaven.
I love big salads. I love steak. I love roasted asparagus. & I love Kraft Classic Caesar dressing.
So I figured why not combine them all into one dish!?

I saved some of the meat and veggies and made another salad for lunch at work the next day and it was still just as good.

xoxo

 {I had to share one more. It was just so good.}

Saturday, May 10, 2014

Decorate with washi tape: Envelopes!


I, like everyone else these days, have an addiction to washi tape. My ever growing collection is my little pride & joy! But I get a lot of comments from my husband, family, & friends wondering what I actually do with all that washi tape so I wanted to show you real quick one of the easy projects I did with my collection.

I was writing in and assembling mother's day cards and a birthday card the other day. I was admiring the cute cards I had picked out but when I closed the envelopes they suddenly looked so plain. My washi collection was practically screaming at me to decorate the envelopes. Here's how they turned out!

{birthday card}

I love how this turned out! The colors are so bright and fun! This yellow envelope was so boring before & it only took me two minutes to transform!

{mother's day}

The tape on this envelope is a little more simple than the last but I still think it looks really nice. This card has pink in it so I wanted the card to reflect that.


I really like the washi I used on this envelope. The multi color polka dot washi is the newest to my collection so I was happy I could incorporate it on this envelope and then coordinate it with other washi's that match the dots.


Then I sealed it shut with a small piece on the back because I had to use more of the polka dots!


And voila! Now the envelopes are as cute as the cards inside!

I love washi tape. If you haven't tried any then go online, spend a few dollars, and order your first roll.
You'll be hooked.

{I order mine on www.jane.com because they have really great sales! I'm just sayin'...}

xoxo

Thursday, May 8, 2014

Cook With Me: Beef Stroganoff

I tried a new stroganoff recipe and wanted to take you along as I made it!

First I cooked the meat.

I used beef I cut up and marinated a few days before. It cooked on medium high heat for a little less than 10 minutes. Once cooked I set aside in a bowl.

The pasta

I used up the rest of an open box of fettuccine. I started it boiling while I worked on the sauce.

Veggies

The recipe didn't call for mushrooms but I love them so much I added my own. I also chopped up onion and minced two cloves of garlic. Once finished I added this all to the pan with some olive oil.

Sauce

I added the can of sauce to the sauteed mushroom, onion, and garlic. 


While the sauce was simmering I measured out 1 teaspoon of worcestershire sauce and 1/2 cup of sour cream.

Then some salt and pepper to taste.

When the sauce had thickened and come to a boil like this...


I added the meat back to the pan.


After the pasta finished I made a salad and dinner was ready!


This was such an easy meal. It cooked quickly and tasted delicious. I think I only spent 25-30 minutes from start to finish. Just looking at these pictures makes me want to heat up a bowl of leftovers right now!

xoxo

Tuesday, May 6, 2014

Desk Organization & DIY washi tape & bakers twine storage


I'm so excited to show you the set up I'm using at my desk in our kitchen. Everything I used was inexpensive, DIY, re-purposed items. I'm so happy to have been able to come up with a system that is both pretty and functional.

{calendar}

I purchased this clipboard calendar for a great price on www.jane.com.


{menu}

I purchased this frame on clearance from Walmart. I spray painted it white and then green. After it dried I sanded the edges to give it a distressed look. I cut a piece of scrapbook paper with a subtle print to fit the frame and voila, I have a cute, custom, CHEAP dry erase menu board.

{clothespins}

I love using clothespins in my kitchen and throughout the house so I decided to decorate a handful with washi tape and display them on a piece of twine. So easy & cute!

{bakers twine}

I absolutely love having my bakers twine collection on display. I made this holder with cork board, hooks, and wooden skewers cut in half. The only thing I had to buy was the corkboard and it came in a value pack so I'll be able to use the other pieces throughout the house. I simply screwed the hooks into the cork, cut the skewers, and voila! I love being able to see the colorful twin + it reminds me to use it all the time!

{mail sorter} 


This mail sorter is from Walmart. I purchased it for $2.00 and spray painted it gold with paint I had on hand. Using two nails I mounted it on the wall. The nails fit easily through the holes in the wire mesh. I love that I was able to mount this on the wall to keep the desk surface cleared off and free of clutter. This is right inside my front door and serves as the perfect spot to drop off the mail each day.

{washi tape}


I used the same system to create this washi display & storage. Corkboard, skewers, and metal hooks. I'm totally in love with washi tape right now so being able to see it all the time at my desk makes me really happy! I much prefer this method of storing than a box or hidden away in a cupboard.

{office supplies}

The only thing I have sitting on the desk is this set of three bowls in a carrier. I keep them in the corner and have them filled with push pins, paper clips, and tape. The colors don't match the rest of my set up but we received it as a gift a few years ago and find it the perfect size for these little supplies.


I hope you enjoyed seeing my desk and perhaps got a few ideas for revamping your desk organization on dime! I love an easy DIY project that is inexpensive AND cute!


xoxo