Tuesday, April 1, 2014

max&ruby: a playdate


the weather on saturday was so nice my friend and i decided our puppies needed to have a playdate


xoxo

Friday, March 28, 2014

My Jewelry Storage


I have a small room in my house that I use to get ready in everyday. I keep my makeup, nail polish, purses, some shoes, and hair stuff in here as well as all of my jewelry. Today I wanted to show you how I store that jewelry. I don't think I have a ton of jewelry but it is enough that I couldn't just use a simple jewelry box so I came up with an easy and affordable set up for me that helps keep my jewelry organized and doubles as decor!

First up, my dangly earrings. 


This is the piece of jewelry I have the least of and I think it is because I have kept my hair so long for so many years that I just don't wear or buy dangly earrings anymore because they get tangled in my hair. The ones I still have left I store on this cute frame my friend made for me using lace ribbon!


Next, stud earrings!

Stud earrings are my weakness, I want to buy them all. Because I have so many I store them a few different ways.


This is a new dish I ordered from Forever 21 for only a few dollars. I keep my newest studs on here. I try not to have more than 10 pairs of earrings on here because if it gets too cluttered I'll forget to wear some of the newer ones.


I got this dish at the thrift store. Here I store mostly pearl and rhinestone studs along with some other older studs I don't wear as much.


Finally I have this box also from Forever 21. Here I keep larger earrings that are still studs but don't fit with the other two dishes. I love the little gold bird on top!


I got this box a few years ago from Forever 21. I've kept different things in it over the years but most recently I've used it to store two costume jewelry rings and a large pair of flower studs that didn't fit in the bird box. I don't wear any of these very often so it made sense to me to have them in their own space.

Necklaces...


I have a really fancy set up for my necklaces (ahem... push pins... cough cough)
I see so many cute pictures on Pinterest of necklace storage but I've been storing my necklaces like this since high school and it just works for me! I can move them when I need to and there is always room for more!

Last up, bracelets!


I store my bracelets two ways. The first, above, is on my push pins with my necklaces. I do that with these small beaded bracelets because otherwise my cats find them, chew them, hide them, and break them. No matter how many times I moved the bracelets the cats always found them so finally I put them up high where they can't be reached!


My few other bracelets (I don't have many) are kept in this pink bowl I got on clearance from WalMart like 5 years ago.

And here's how it all looks in the corner of my room...


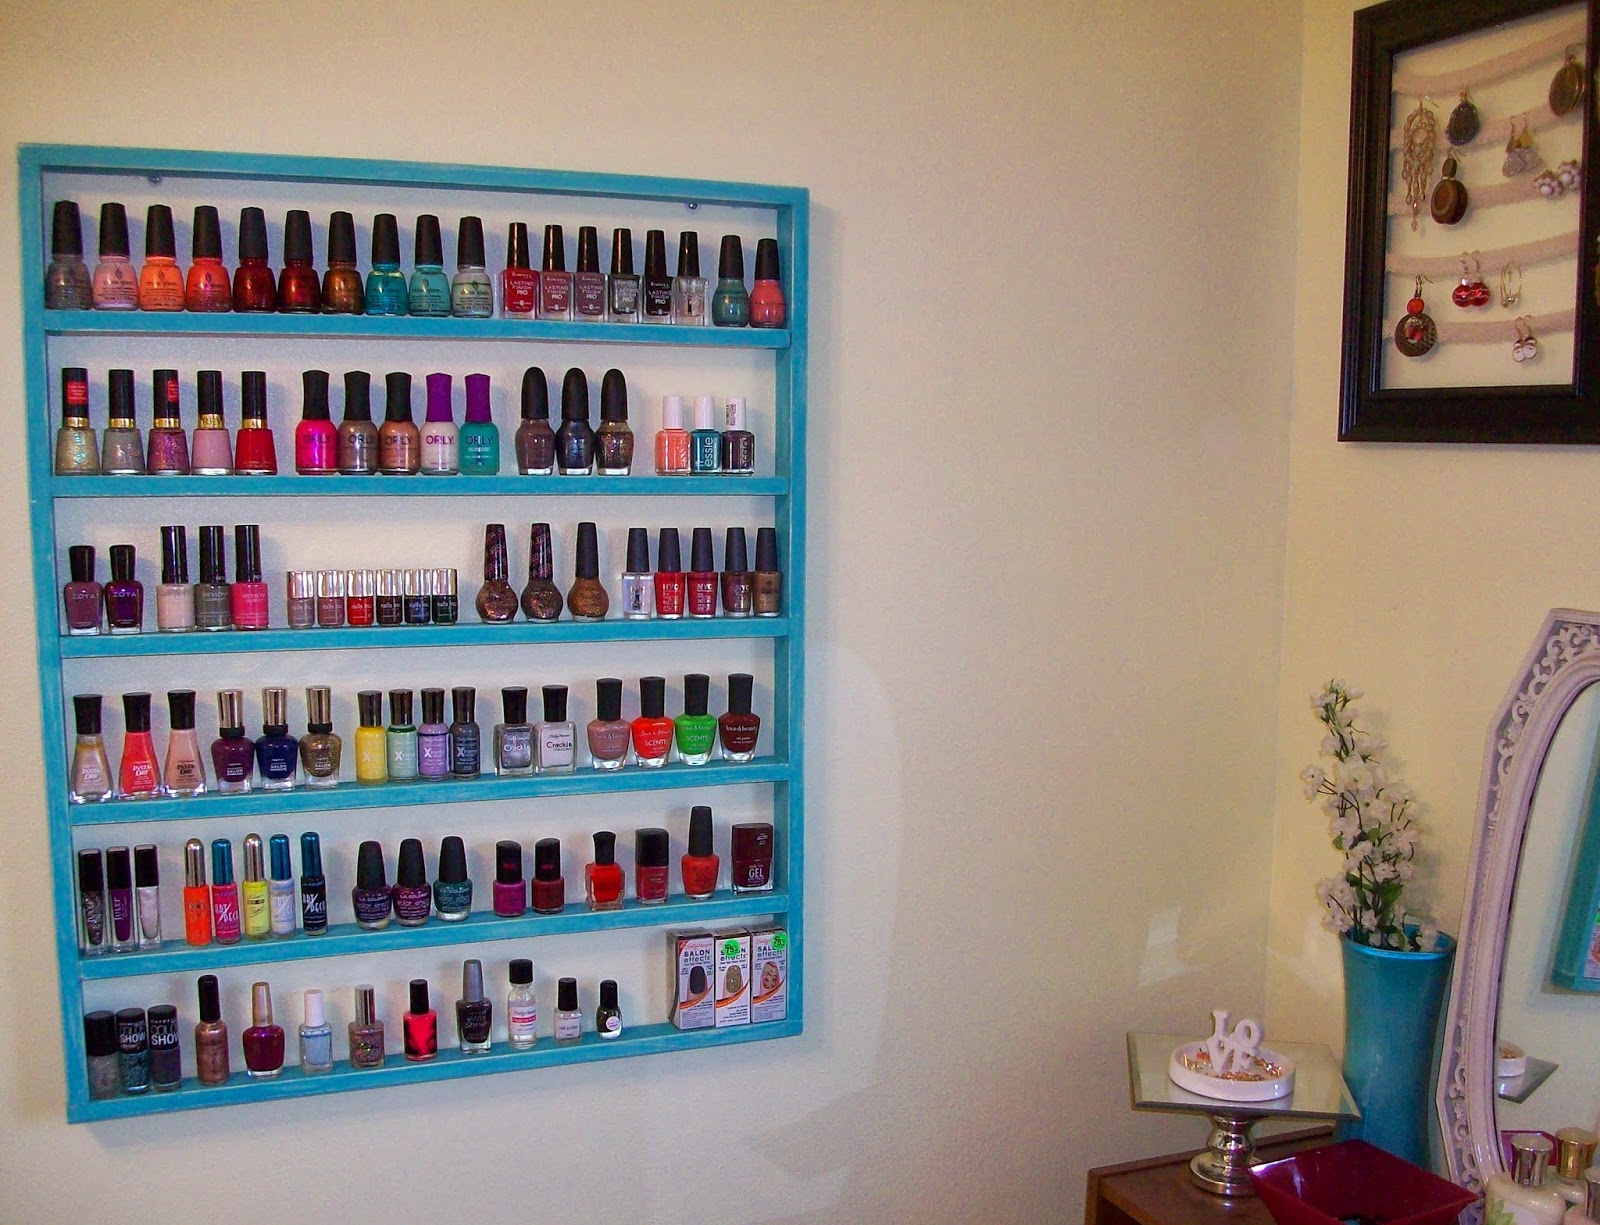
(with my pretty homemade nail polish rack. *sigh* I just love it)

xoxo

Tuesday, March 25, 2014

Current Nail Polish favorites

 
These are the polishes I have been using most lately...
 
 
{from left to right}
Essie -- Sable Collar
Zoya -- Odette
Sinful Colors -- Soulmate
Deborah Lippmann -- It's Raining Men
 
 
& my favorite glitters
 
 
{from left to right}
Sally Hansen Complete Salon Manicure -- Golden Rule
Sephora by OPI -- Spark-tacular!
Maybelline Color Show -- Diamond In the Rough


xoxo

Saturday, March 22, 2014

Manicure Must-Haves && fun extras!

 
Pre-Painting Prep!
 
 
First I remove whatever polish I'm wearing. I really like this Cutex brand remover!
Next I file, trim, and smooth my nails. I love my Sally Hansen clippers & buffer block.
I love this cuticle oil: OPI Avoplex Nail & Cuticle Replenishing Oil. I've had this for several years and it is still going strong. It has a really nice subtle scent and makes my cuticles so soft!
Occasionally I put my cuticle back and have recently fallen in love with these cuticle pushers from e.l.f. They come in a 2 pack for $1.00 and they are really nice quality!
 
Base Coat
 
 
I have two base coats I really love. The one I've used the longest is the OPI Nail Envy Nail Strengthener. The newest base coat I've fallen in love with is by Orly and it is their Bonder Rubberized Basecoat. These are both great options to use prior to applying color to your nails.
 
Quick Dry High Shine top coats
('cuz why use anything else ?!)
 
 
I've tried many over the years and these are my favorites for the price that dry quick and deliver a really high shine. Both are from Sally Hansen: Dries Instantly and Insta-Dri. Insta-Dri is a bit shinier but the product dries up quicker in the bottle so I feel like Dries Instantly is a better deal because you don't lose out on any product going goopy in the bottle!
 
Polish Maintenance
 
 
Speaking of polish going goopy. When you have a lot of polish or even just a few bottles that aren't getting used up quickly then I recommend a bottle of Nail Polish Thinner. I got this as Sally Beauty Supply for a few dollars and it has saved many a bottle of nail polish. It is normal for an unused polish to get goopy and hard to work with over time but squeeze a few drops of this in bottle, shake it up, and voila! Nail polish saved!
 
Extras & Embellishments
 
 
I love to decorate my nails after painting them. I like doing glitter accent nails or using the Sally Hansen Real Nail Polish strips but I've also come to love rhinestones and stickers. The full nail stickers can be worn alone or over a color and so many brands make them now. Sally Hansen like I mentioned and also Sinful Colors, Essie, NCLA, Sephora, L'Oreal... the list goes on and on.
 
 
These gold glitter strips are the newest addition to my collection. I ordered them online from either Groopdealz or Jane... I don't remember. But they make such a cute embellishment to a manicure and how can you go wrong with anything glittery and chevron... right?!


Hope you enjoyed,
what are you nail polish basics and favorite ways to embellish a manicure?
 
 
xoxo

Thursday, March 20, 2014

DIY Nail Polish Rack

 
I am so excited to show you the homemade wooden nail polish rack that my husband and I made.
For so long I have wanted a nail polish rack that hangs on the wall but the prices online to buy one were out of the question ($60 or more + $20 shipping... I don't think so) so I researched blog posts about diy versions and enlisted my husband to help with the construction.
The wood cost $3.27, we already had screws, brackets, wall anchors, AND the paint. So yes, I only had to spend an additional $3.27 to finally have my nail polish rack!
 
 
The boards are 1" x 2" each and the whole thing is 29" tall and 26" wide. The shelves are 24" wide.
 
 
I spray painted the whole thing ivory but did not like how the wood looked because all the bumps and flaws were really obvious in the light color. So I took the last of a tube of aqua wood paint and mixed it with some white and a few drops of water to thin it out and painted that over the top. Once the whole thing had dried (which was really quick since the paint was so thin) I sanded over the shelves that had bumpy spots and then sanded the edges to give it a distressed "shabby chic" look.
 
 
And Voila!
I have a nail polish rack that was easy to make (thanks to my husband) and is so much more affordable than ANYTHING I could have found online! 
 
 
I'm in love with it.
 
xoxo